View Search Results and Related Documents
Eclipse SE makes it easy to examine and work with the results of multiple searches. Users can pull up all documents in a case or batch that meet the criteria of their search. Furthermore, they can choose to include Family documents that lie outside the parameters of the search, but which bear a relationship with documents that do appear in the search.
Read through the following sections to learn how to:
View Search Results
After executing a search, the results will appear in one of the places listed below. Click on a link, or scroll down to learn more about each of the areas where search results appear. Additionally, you can learn more about search highlight options by reviewing the section below.
- Search Results Tabs
- Case Folders Tab
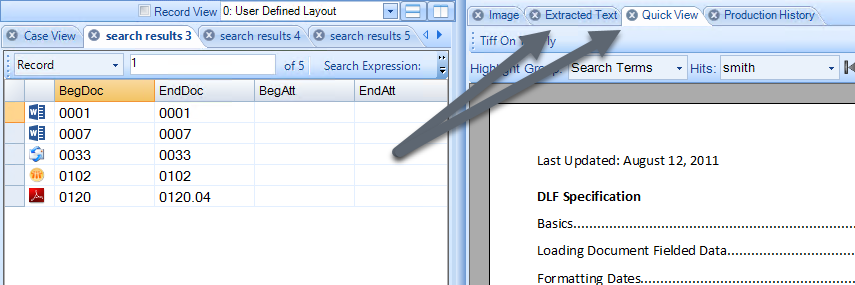
- Image Tab
- Extracted Text and Quick View Tabs
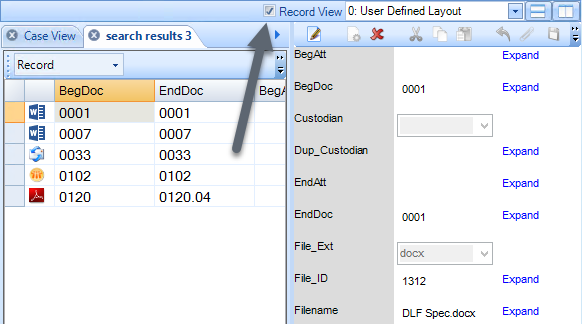
- Record View
- Transcript Search Tab
Search Highlight Options
You can customize the highlighting colors—text and background colors—for search hits in the Image (when word coordinates are defined for images), Extracted Text, and Quick View tabs (when native files are text-based files, not image files). This is a user preference that applies to all cases or batches you may work on.
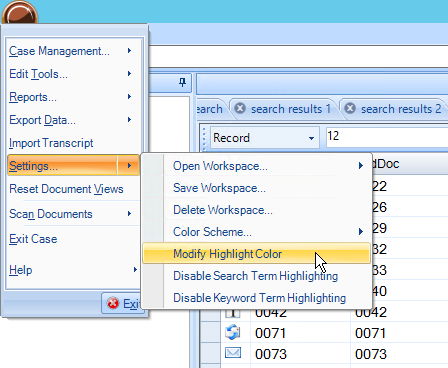
To change search-hit highlighting :
-
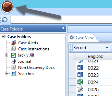
Once you have opened the Eclipse SE Desktop work area, click on the Eclipse SE Desktop button in the top-left corner of the page.
-
Select Settings > Modify Highlight Color.

The Select Search Term Highlight Color dialog box displays.
-
To change text color:
-
Click the corresponding down arrow to expand a menu displaying the various colors you can select.
-
Click the desired color.
-
-
To change background color:
-
Click the corresponding down arrow to expand a menu displaying the various colors you can select.
-
Click the desired color.
-
-
Evaluate the sample text in the bottom-left corner of the dialog box to ensure it meets your needs.
-
Click OK.


|
NOTE: If you have already performed a search, you may need to click a different tab in the document details pane to update the search highlighting color to your new settings. |
 Search Results Tabs

Case Folders Tab
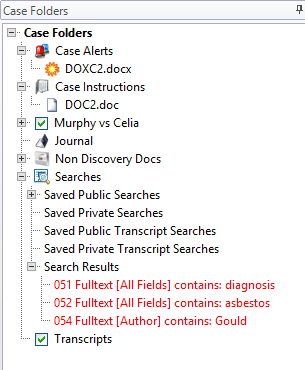
Image Tab


Extracted Text and Quick
View Tabs

Record View
Transcript
Search Tab
 beside each transcript or folder you would like to open.
 View Documents Related to Search Results
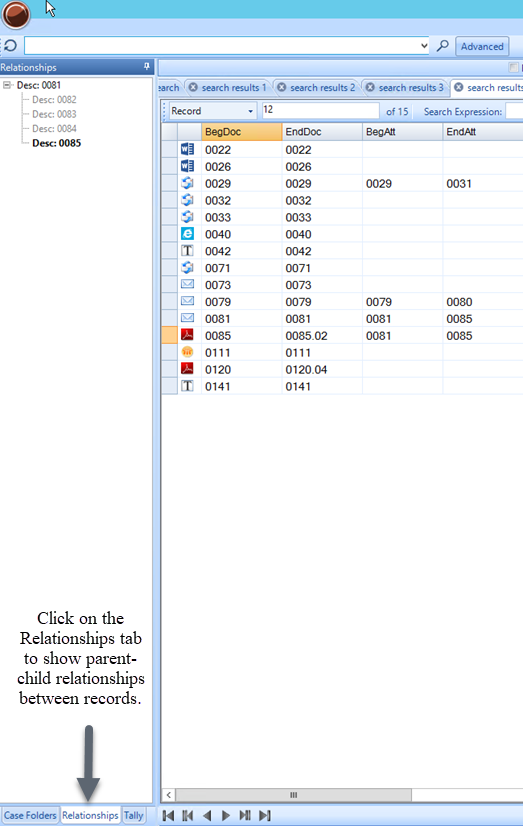
About Document Relationships
Document relationships may be defined in the cases you are working with. The Relationships tab, in the bottom left corner of the Eclipse SE Desktop work area, shows the parent-child relationship of documents associated with a selected record. Ask your administrator if you have any questions about related documents in your cases.
Eclipse SE includes a search feature for related documents as described in the following paragraphs. This procedure can be performed for cases (not in batches).
Procedure
If you perform a search in a case that includes related documents, the search results may include documents that are related to documents that do not meet the search criteria. You can create a “family search,” that is, a Search Results tab containing the initial search results and related documents, as follows:
- Create a family search in one of two ways.
- From a Search Results tab. (See step 2.)
- From the Advanced Search dialog box. (Skip to Step 3.)
-
To bring in family documents from a Search Results tab, begin by performing a needed search. In the resulting Search Results tab that opens, right-click in any of the fields and select Bring in Family Documents.

A new Search Results tab opens, containing the original search results and related documents as defined.
-
To bring in family documents from the Advanced Search dialog box, begin by clicking Advanced on the main search bar.

The Advanced Search dialog box displays.

- Define a new search, load a saved search, or use a search from the search history tab to populate the Query Builder field. (For guidance, see Use Advanced Search, Change an Advanced Search, or Use Search History for instructions on each procedure, respectively.)
- Once your search has been defined and the Query Builder populated, select the Include Entire Family option at the bottom of the dialog box. To keep related documents together after sorting, select Keep Family together when Sorting.


Perform Other Search-Result Activities
In addition to viewing search results, you can work with the documents associated with the records appearing in a Search Results tab as you would the Case View tab. You can make redactions or apply tags, use the results to create a Private Folder, or perform any of the procedures explained in this online Help.
Also, a special tagging feature exists for search results—you can apply a document tag to all records listed in a Search Results tab at once, as explained in Tag Search Results in Private Folders, Smart Folders and/or Documents.
Finally, you can save search results to a comma-delimited text file as explained below, in Export Search Data.
View the instructions below for more information on document-related procedures you can perform while working with search results.
Export Search Data
For details on exporting search results (field data for the records comprising the search results) to a .CSV, .DAT, .DLF, or .LFP file, see Export Case Data. Make sure the needed Search Results tab is the active tab when you perform the referenced procedure.
Print search results
To print one or more document images (including mark-ups if desired) from search results, see Print and Email Documents or Document Pages on the Image Tab.
Make sure the needed Search Results tab is the active tab when you perform the referenced procedure.
Create a Context Search Report
To generate a Context Search Report that provides a summary of search results (including search result hit highlights), see Generate a Context Search Report.
Related Topics
Last Revision: 6/2/2023
Version: 2019.0.0